Friday, August 28, 2015

Gyro Flies Pepsi! Pt. II - Pita Bread


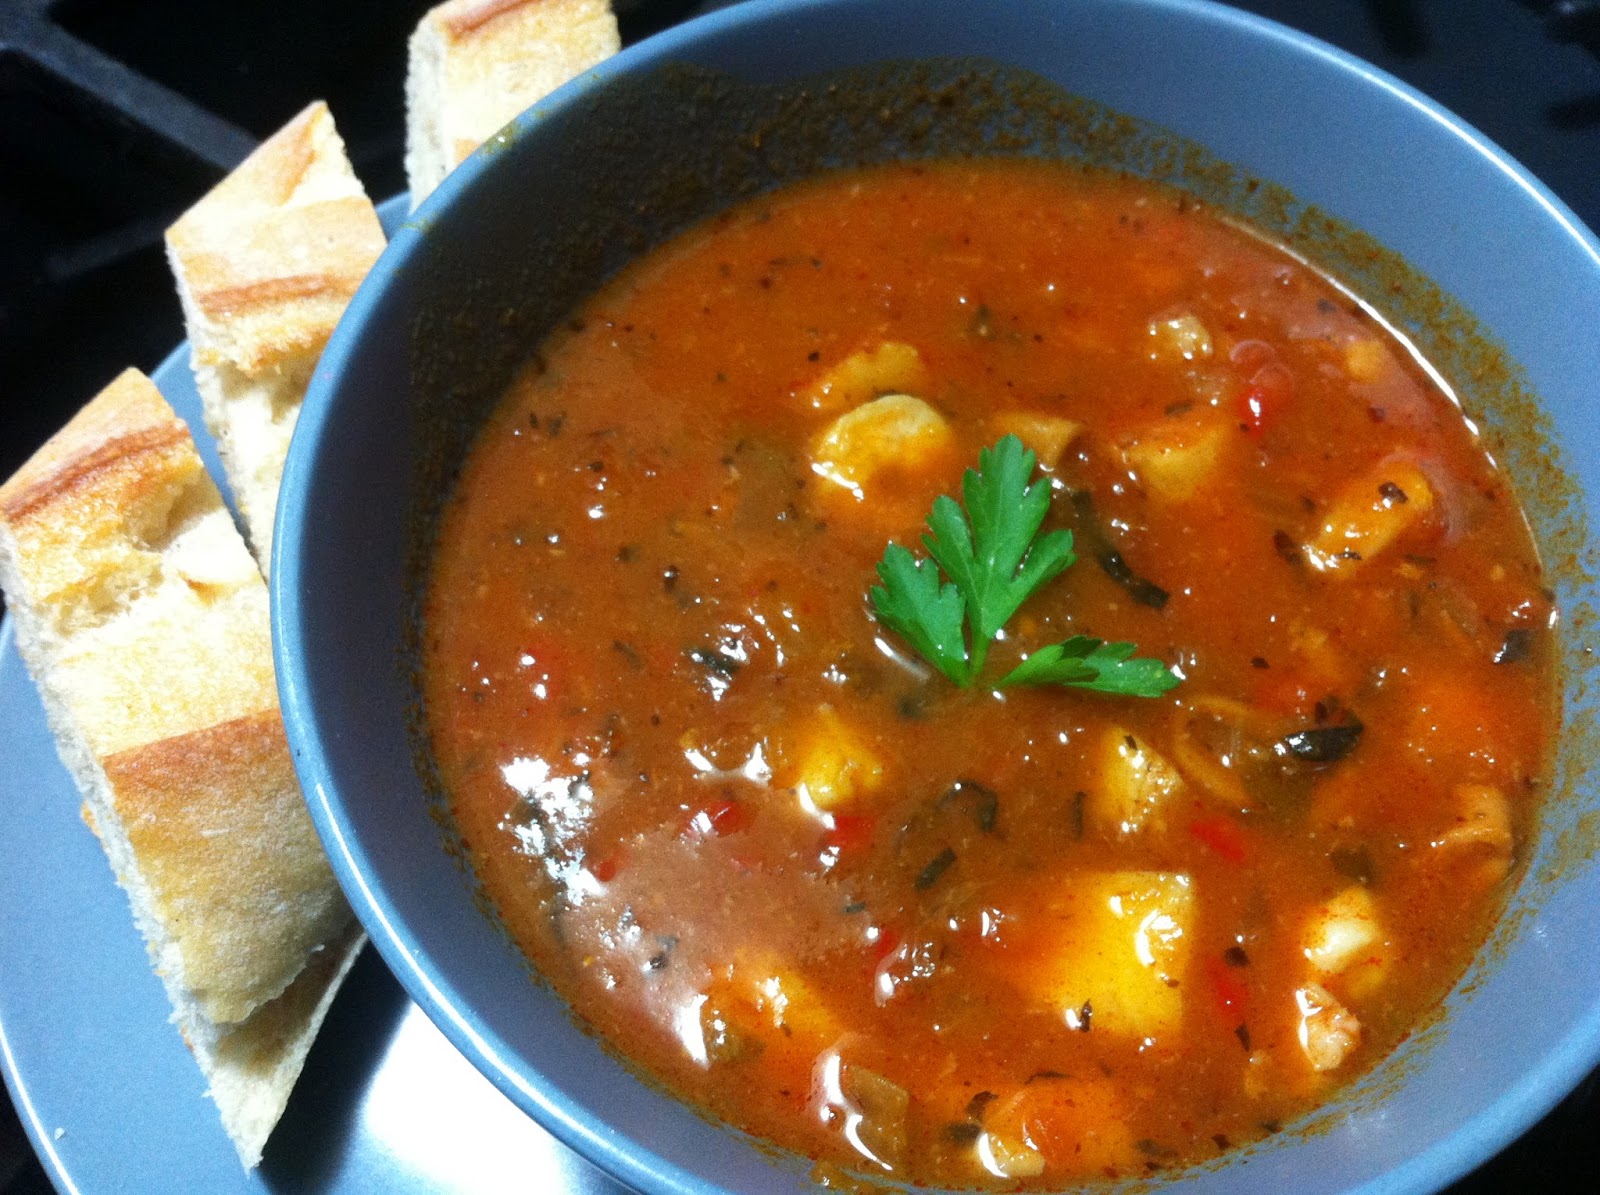
At long last, you can finally make your own Gyros at home!  And not the lame-ass kind that come in a kit...I mean honest to goodness, crowded, loud shop full of Greek immigrants and pungent smell of gyro meat on the rotisserie, stink like gyros for days Greek Gyros!!!

A couple years ago, I helped you get about 75% there when I published this blog post on how to make the meat and tarziki sauce at home from scratch.   Thanks to an anonymous reader of this blog, here is 'the rest of the story' -- making the Pita Bread.

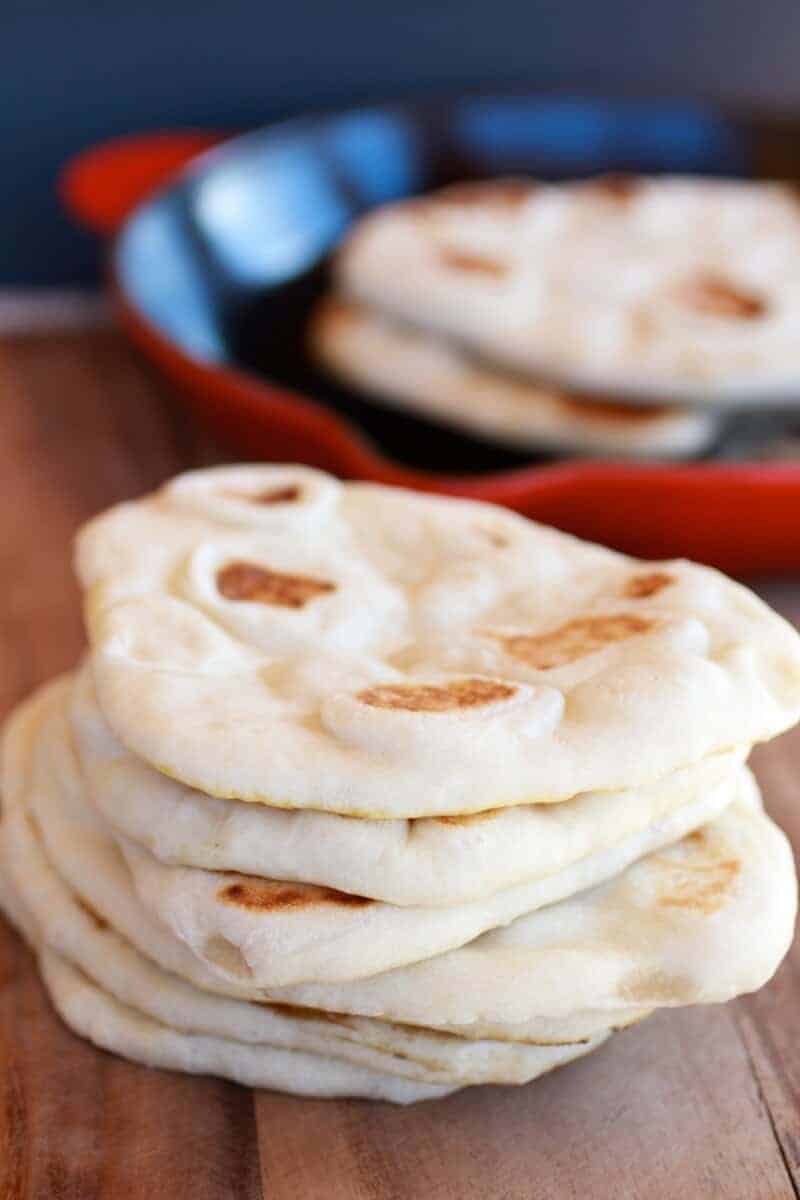
You will NEVER buy Pita Bread in the store again!  You'll find yourself making this for lots of other things besides Gyros.   It's easy, fairly forgiving, and insanely delicious.

1 c. warm water, about 95 degrees
2 tsp. active dry or instant yeast
2 3/4 c. flour
2 tsp salt
1 T olive oil

Instructions

Make a yeast starter by mixing the water and yeast and a pinch of sugar for the yeast to feed upon and let sit for about five minutes until the yeast is dissolved and foaming up a bit.  In a mixing bowl, add flour, salt and olive oil, add yeast mixture.   If using a stand mixer attach the dough and knead the dough on medium speed for about 8 minutes, til you have a smooth dough. If using your hands sprinkle a little of the extra flour onto your clean work surface and turn out the dough. Knead the dough for about 5-7 minutes, until the dough is smooth and elastic. Add more flour as needed to keep the dough from sticking to your hands or the work surface, but try to be sparing. It's better to use too little flour than too much. If you get tired, stop and let the dough rest for a few minutes before finishing kneading.

Coat the inside of a large bowl with olive oil, place the dough in the bowl, cover with plastic wrap and let rise at room temp for about 1 hour til the dough doubles in size.  For all practical purposes, you're done at this point until you're ready to make the gyros, because although these pitas are good anytime and keep well, they're best fresh.   You can refrigerate the dough for up to a week.

When ready to make pitas, heat up a cast iron skillet with a little olive oil in it, on medium-high.  Divide the dough into 6 balls.   Using a floured rolling pin, roll one of the balls on a floured surface into a circle about the size of your skillet.   It will want to spring back at first, but keep rolling, re-flouring the rolling pin if necessary.  Suddenly it will behave and roll out with ease.

Lay a rolled-out pita in the skillet and watch until you see bubbles starting to form. Flip and cook for about 30-45 seconds on the other side, until large toasted spots appear on the underside. Flip again and cook another 30-45 seconds to cook the other side.  Remove from heat, keep covered on a plate with paper towel until all the pitas are done, serve!  Enjoy gyros that will make you swear you're on State St. in Madison, WI!

Thursday, August 27, 2015

A-2 Sauce


I'm a freak for A-1 sauce.  I'd sit down on the porch with a gallon of it and a glass and drink it all if I could.  I put it on steaks, burgers, hash browns, toast, rice, potatoes, just about anything.  I even tried it on ice cream once.  It wasn't too bad!   Well, for someone who's an A-1 sauce freak, that is.

But the stuff has gotten really spendy.  The price started climbing about the time Kraft took it over and ruined the label and took all the medals from the 1890 Exposition off, and dropped "Steak" to leave just "Sauce".  They haven't ruined the recipe...yet...

And so, like with so many other things, I set off to learn how to make my own A-1 Sauce clone.  Something close to this recipe can be found elsewhere on the net, but I think my tweaks and revisions end up with a better sauce overall.  It's very close to A-1 sauce, it's clearly tastier to me than any other brand of steak sauce, and the price is right, much cheaper overall than buying the equivalent amount at the store.  Plus, if you're a foodie, you probably have most of the ingredients lying around.

A-2 Sauce:

1/2 c. cold water
1/4 c. raisins  EDIT:  Use golden raisins, it will taste more like A-1.
1/2 c. balsamic vinegar (don't substitute)
1/4 c. good Worcestershire sauce (I used Lea and Perrins)
1/4 c. Ketchup
1/4 c. Dijon mustard (I used French's Chardonnay Dijon, Poupon would work fine)
1/4 t. black pepper
1 garlic clove, diced up
1 stalk celery, cut up
1/4 t. salt
1/4 t. celery seed
1 t. bottled Lemon Juice
1 tsp onion powder
1 orange

Put all but the orange in a saucepan on the stove.   Cut the orange in half, squeeze the juice into the saucepan.  Scoop out the innards from the orange half.   Squeeze the juice from the other half of the orange into the saucepan.  Bring to a simmer and let simmer for about 15-20 minutes.

Do not attempt to adjust seasonings until cool, the taste changes from hot to cold.

Strain through a strainer and bottle.  Serve at your next steak fry, or try on hamburgers, brats, meat loaf, pudding, ice cream, cake, brownies, macaroni, kiwi fruit, bananas...


Saturday, July 25, 2015

Rockin' Ramen Salad


Ok, kids...you've probably all had this at one time or another at a pot luck in the summer.   I'm a self-admitted Ramen Salad maniac, I just LOVE the stuff.

I've piddled around with recipes for years before settling on this one, which is--as most of my recipes are--a hodgepodge of other recipes plus my own twists.

1/2 head cabbage, finely chopped
1 medium onion, chopped
2 pkg. Ramen noodles (Oriental flavor), crumbled
1/2 c. sliced almonds, toasted
2 carrots, chopped
1/2 cup peas

DRESSING:
2 tbsp. sugar
3 tbsp. vinegar
1 T sesame oil
1/2 c. olive oil
2 T soy sauce
1/2 tsp. pepper
Flavor packet from the noodles

Chop up the carrots and cabbage (or just buy a bag of 'Slaw Mix' in the produce section).  Toast the almond slivers in a buttered skillet til just turning brown, remove.  Mix all ingredients for the salad in a bowl.  Mix the dressing ingredients, pour over bowl, mix well, refrigerate.  Like all such salads, it's better if made the night before.

Now, some people will argue that the Ramen noodles should be crunchy.  If that's the way you want it, leave the Ramen noodles OUT til just before serving, then mix them in.

Enjoy!

Friday, January 16, 2015

3D Printer Bean Soup


First, you don't really make this soup with a 3D Printer...but it's ALMOST that easy!   Thick, hearty bean soup is great on a cold winter day.   It'll thaw out your innards and 'get you moving', if you know what I mean.  And it's DELICIOUS!!!

You can kind of go nuts with this recipe, adding or subtracting root vegetables like parsnips, turnips, rutabaga and carrots, or add/subtract herbs to your liking, but this is the basic recipe.  You need a crock pot, which is kind of like the culinary version of a 3D Printer.   Sort of.  Well, maybe not.

In this recipe, I used a grapefruit-sized chunk of smoked pork shoulder (Usinger's brand), but any chunk of ham product would work, as would a 16 oz. package of diced ham, which would even save you the trouble of dicing.  

1/2 lb chunk of Smoked Pork Shoulder or Butt
16 oz bag of Great Northern Beans
1 large Onion
4 medium Carrots
2 Qts Water
1 T Chicken Bouillon powder
2-3 Bay Leaves (Mom always said it's not soup without Bay Leaves)

Dice the Smoked Pork and the Onion.  Slice the Carrots.  Put all ingredients in a crock pot, turn on High for about 4 hours.  Stir, check progress (all crock pots cook at a little bit different rates), leave on high or turn down or turn off at your judgement.  Beans and Carrots should be soft, liquid should be milky and not clear, ham should be starting to fall apart a little when done.  Salt and pepper to satisfaction.   As with all soups, the longer it sits, the better it is. 

About 5 minutes of prep, and an occasional stir.   That's it!

Thursday, January 15, 2015

Wise Guy Baked Ziti


Ok, I admit it.  I'd never heard of Baked Ziti before I watched the Sopranos.  Of course, growing up in Central Wisconsin as I did, I wasn't exposed to a lot of Italian neighborhoods.  You'd have to travel a few hours to find one.  Mostly, it was Poles, Germans and Norwegians around where I grew up.

I developed this recipe over several years of tinkering with a very basic Ziti recipe, and it's always a big hit.   No, not that kind of hit...it's not going to rub you out, but it will sure fill you up!  Throw this in the oven, pop "The Godfather", "Goodfellas" or "The Sopranos" in the DVD player, get the Grappa ready for afterwards, and enjoy!

1 box Penne (Ziti) Pasta
1 lb Italian Sausage
1 16 oz container Ricotta Cheese (use Cottage Cheese in a pinch)
1 T finely chopped fresh Basil
1 T fresh minced garlic
16 oz grated fresh mozzarella
1 can of Red Sauce of your choice** (I usually used canned Hunts or Del Monte and jazz it up with red  wine and seasonings)
8 oz. fresh mushrooms
1 medium onion, diced finely
1 small container Feta cheese crumbles
A small amount (1/3 cup at most) milk

Start by boiling salted water and adding the Pasta, cook til Al Dente (so they're just on the cusp of being 'done' but a bit chewy yet).   While the Pasta is cooking, fry up the Italian Sausage and drain off the grease.   Strain the Pasta and cool.   Mix the Pasta with the Ricotta cheese, Feta cheese, Minced Garlic, Chopped Onion, Chopped Basil and Milk.   In a 9x12 Pyrex dish, lay down a layer of half of the Red Sauce, then the Pasta
mixture, then the layer of Italian Sausage, then a layer of Mushrooms.   Grate the Mozzarella Cheese over the top and finally cover completely with the other half of the Red Sauce.   Bake in a 350 oven for 1 hour.

**Update:  I have since grown a bit and no longer use crappy commercial 'spaghetti sauce'.   A great, easy red sauce can be made by taking a can of good quality (not big commercial brand, but imported from Italy) crushed tomatoes and putting it in a saucepan on medium low.  To this, add a heaping T or more (to taste) of sugar, some garlic salt, a bunch of finely diced garlic toes, about a quarter cup red wine, finely chopped basil, some oregano and/or Italian seasoning, optionally some finely diced green peppers and/or onion.  Simmer on low, covered, for an hour or so, then uncovered til it reaches a nice, thickish consistency.

Of course, if you're in a hurry or just a lazy sot, you can always hit the Ragu.

Thursday, January 8, 2015

Cioppino - Quick and Easy


Cioppino - an Italian seafood stew - warms the tummy and the heart.   It's wonderful on a cold winter day, or to take the wet out of a cold rainy day the rest of the year.   There are about as many ways to make Cioppino as there are Chili, but this is my Mom's recipe and my go-to one.  Here in the Flyover Zone, where we're far from fresh seafood unless it's flown in at great expense, frozen 'seafood mixtures' are the rule rather than the exception and they work well.  Trader Joe's has a great seafood mix.  Woodman's Grocery in Wisconsin also has one, though it's heavy on the mussels (I pick most of them out while the mix is still frozen and throw them in a separate bag of collected mussels for later use...they're a little fishy for my taste).  What we lack in fresh seafood we make up for in garden fresh or home-frozen tomatoes and herbs, which make up a great deal of this stew's flavor as well.

Make up a batch and try it for yourself.  I'm sure you'll love it as much as I do!

1/3 cup Olive Oil (can use 1/3 cup butter)
1 medium-large or 2 small Onions, diced finely
1 small can Diced Tomatoes
1 quart bag Frozen Tomatoes or 1 can Whole Tomatoes
2-3 cloves Garlic, diced finely
1 Bay Leaf
1 tsp Basil
1/2 tsp Thyme
3/4 cup Sweet Vermouth
1 bag frozen Seafood Mix (sometimes called Seafood Medley)
1/2 cup chopped Parsley
1 can (or bouillon equivalent) Chicken Broth
1 cup Water

In soup kettle, add Olive Oil, Onions, Garlic and Parsley.  When Onions are clear, add Tomatoes, Broth, Water and Sweet Vermouth (or any Red wine).   Bring just to a boil, bring heat down to simmer, add herbs and simmer for 15 minutes.    Add Seafood and simmer until the seafood is done.   The longer this sits, the better it tastes.  Serve with good bread and a salad.